Build a Personal Blog with GitHub & Jekyll
How to Build a Blog using a GitHub Pages Site?
A hands-on, beginner-friendly guide for developers and students
Hello, all 👋
Ever wanted a place to share your projects or notes online without learning full-stack development?
Then You’re in the right place!
In this tutorial, we’ll create a clean, customizable blog using GitHub Pages and Jekyll for free.
No design skills, server setup, or backend knowledge required.
Let’s get started!!
What You’ll Need:
- A GitHub account
- A little Markdown knowledge (don’t worry, we’ll cover it)
- A Jekyll theme you like
1. Choose a Jekyll Theme
I’m guessing you already have a GitHub account — but if not, create one first 👉 GitHub
Done? Let’s get started.
Head over to the Jekyll Theme Gallery
Pick a theme that fits your vibe. Minimal, academic, colorful, retro… whatever.
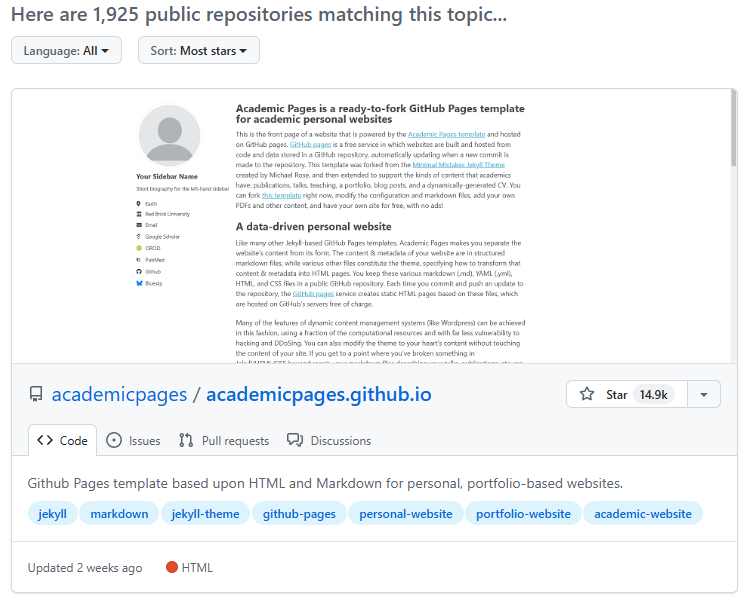
In this tutorial, We’ll use the academicpages, which is great for portfolios, blogs, and even resumes.
2. Fork the Repository
Once you’ve chosen a theme:
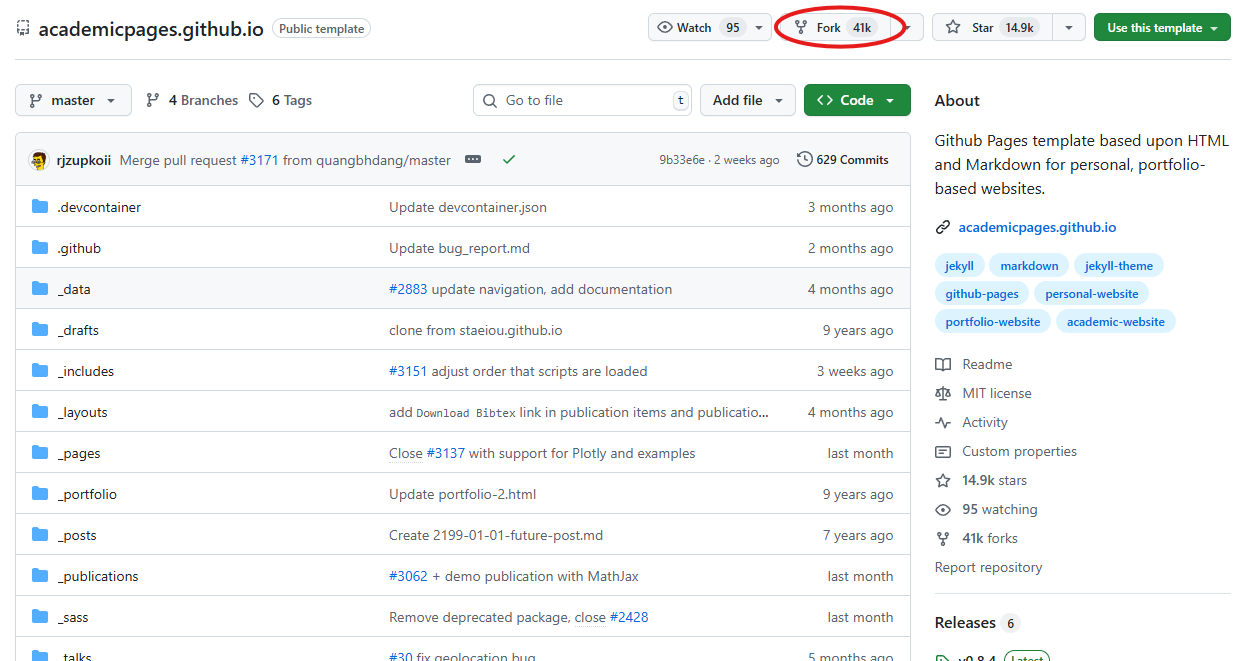
- Click the Fork in the top-right corner of the theme repository.
- Rename the forked repo to match this format:
yourusername.github.io
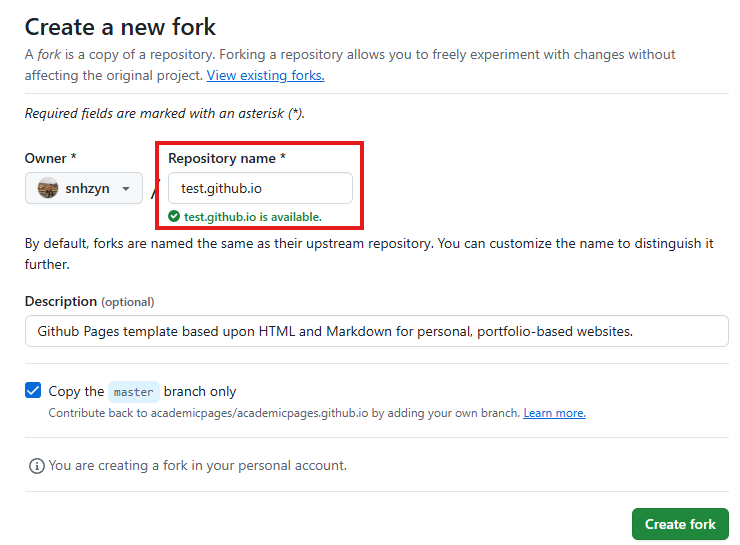
✅ This naming is important! It tells GitHub to publish your site automatically.
(I already have a blog, so I’ll create this one as a test!)
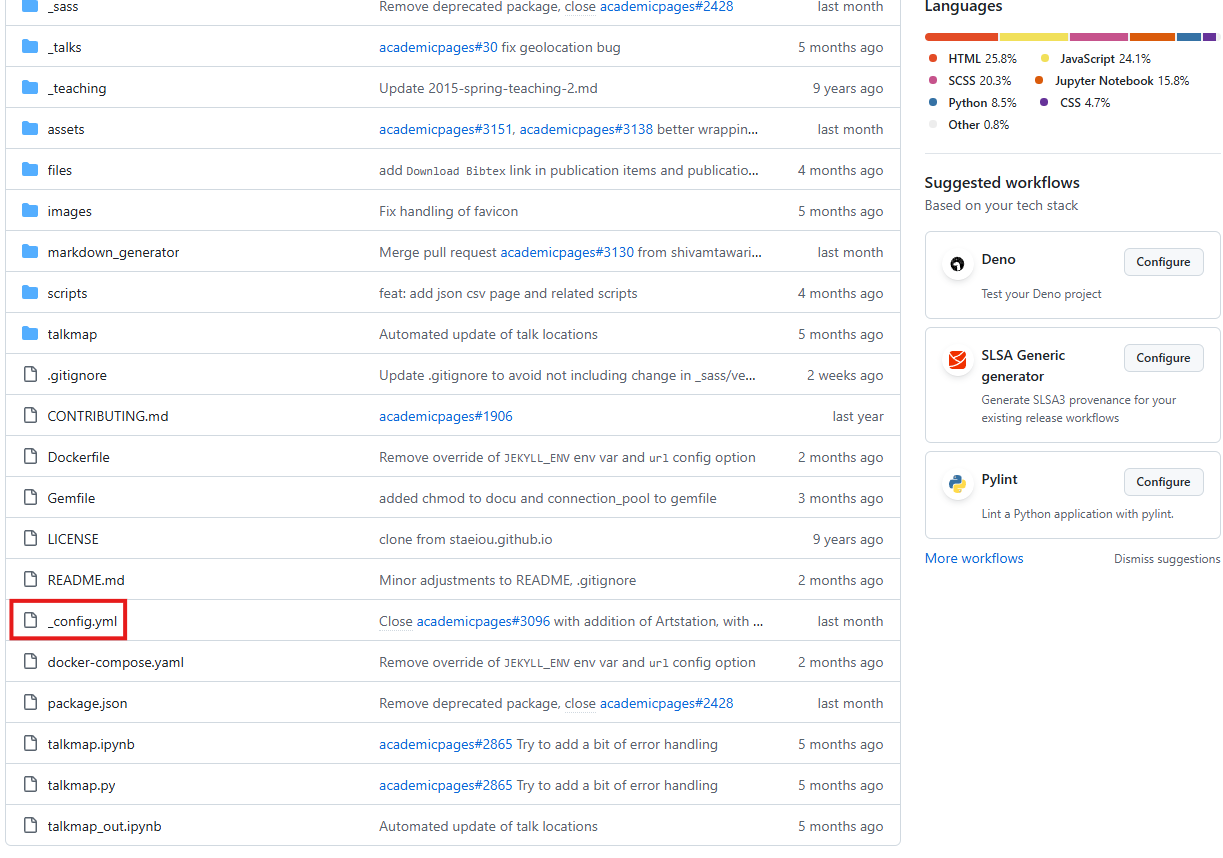
3. Configure _config.yml
In your new(forked) repository, find and open the _config.yml file.
Update the following lines:
1
2
url: "https://yourusername.github.io"
baseurl: ""
You can also edit your blog’s title, description, author, and social links here.
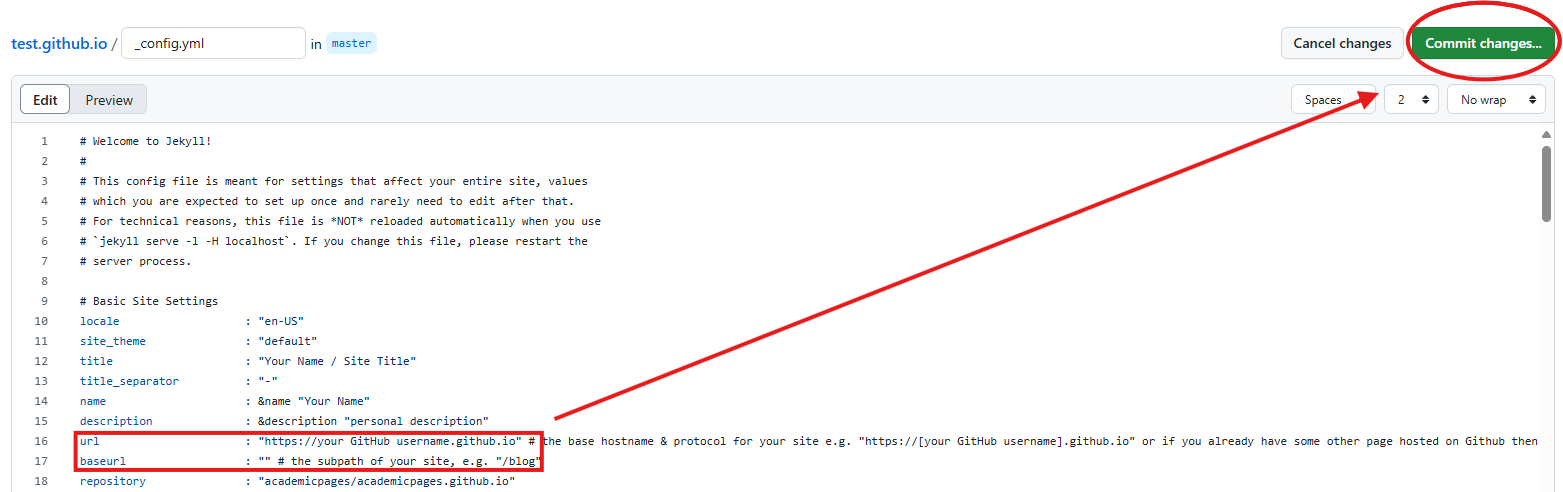
Take a moment to make it yours. Once you’re done, commit changes.
4. Enable GitHub Pages
Now let’s publish the site!
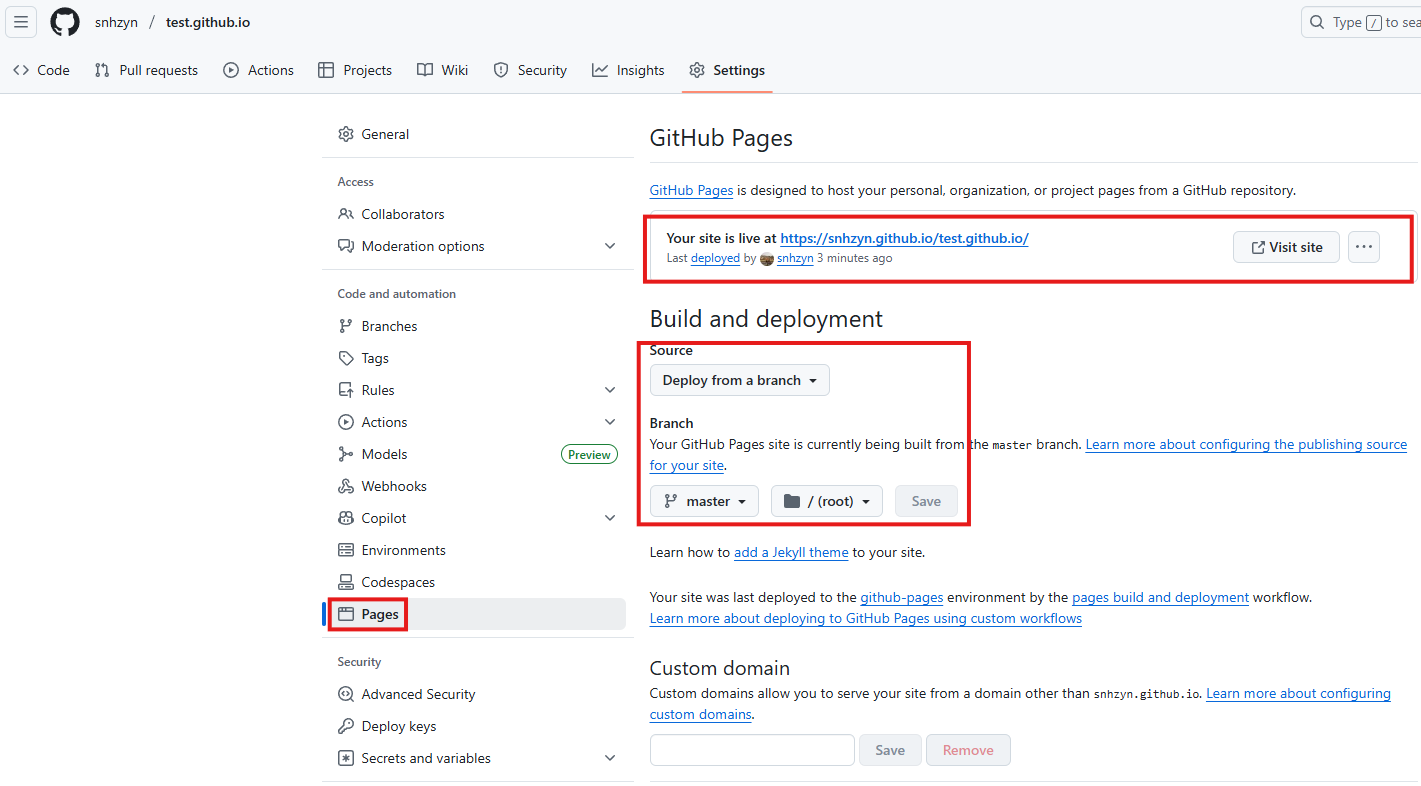
- Go to your repo’s Settings tab.
- Click Pages in the left sidebar.
- Set the following options:
- Source:
Deploy from a branch - Branch:
mainormaster - Folder:
/ (root)
- Source:
- Click Save
That’s it. GitHub will now build and publish your site.
Afer a few seconds, you’ll see a URL like: https://yourusername.github.io
5. Write Your First Post
Time to write your very first blog post.
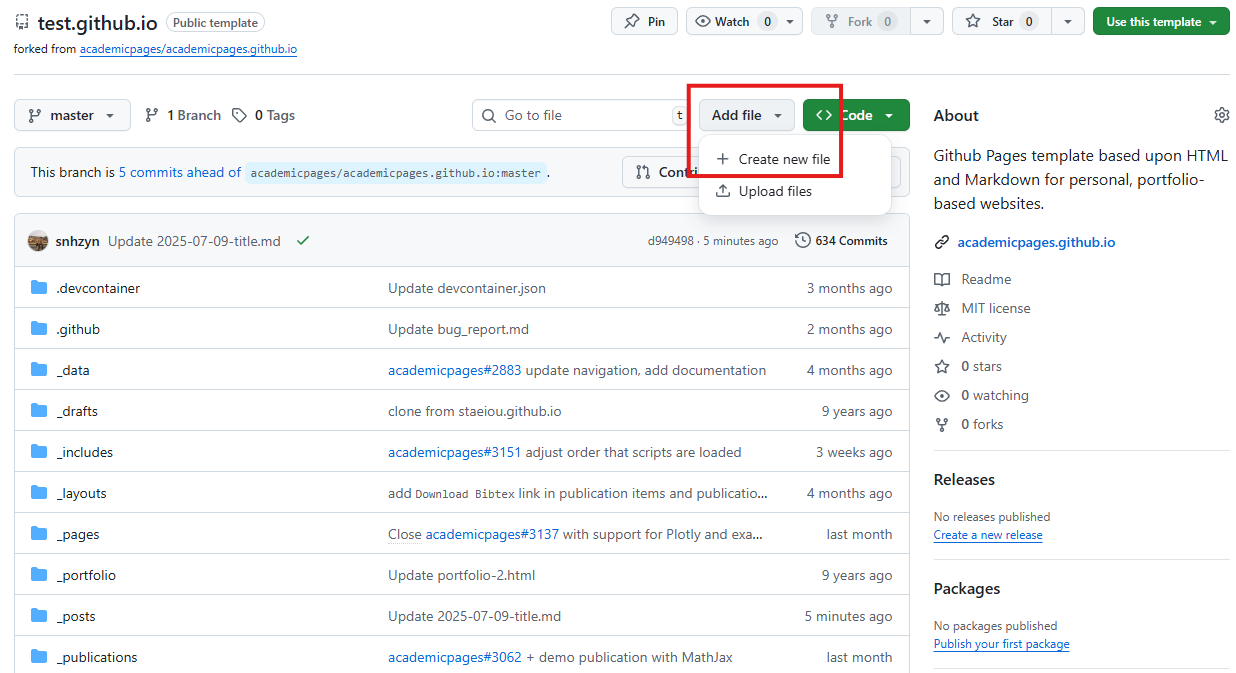
- In your repo, click Add file → Create new file
- Name your file in the following format:
_posts/YYYY-MM-DD-title.md

- In the editor, copy and paste the following sample content:
1
2
3
4
5
6
7
8
9
---
title: "My First Post"
date: 2025-07-24
layout: post
---

Hello, world!

Write anything what you want!
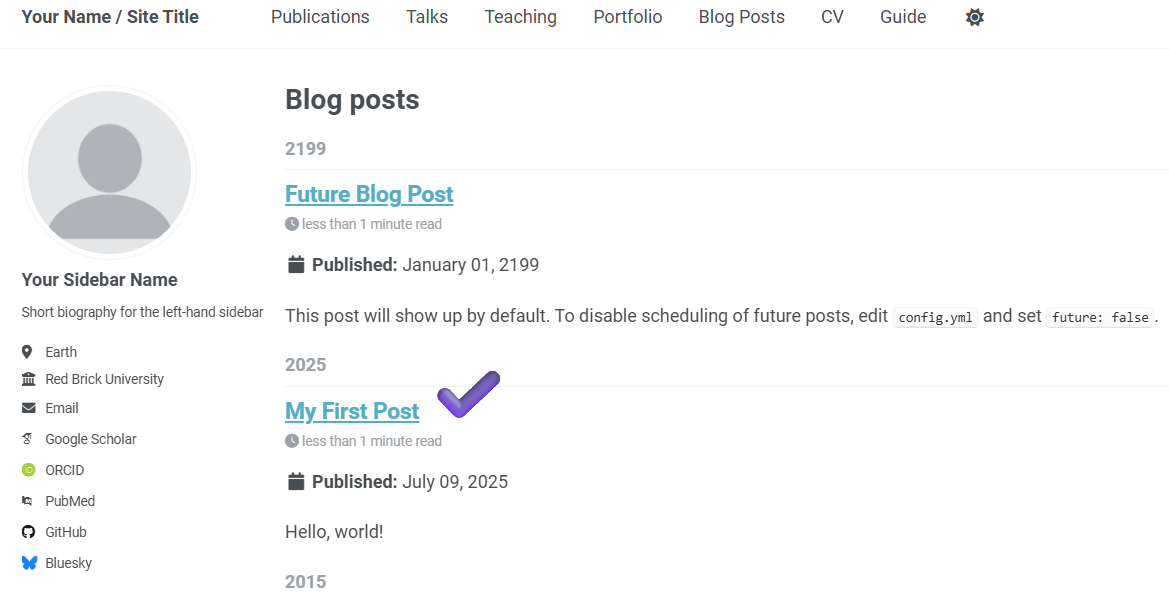
- Click Commit changes…
Your post should now appear on your blog homepage.
✅ Tip & Troubleshooting
Make sure your filename follows the correct format:
_posts/YYYY-MM-DD-title.md
- It must start with a valid date.
- It must end with
.md. Want images?- Upload images into the
/assets/img/folder and use standard Markdown:
DONE!
You’ve now created very first blog, powered by GitHub and Jekyll.
Was this guide helpful?
Leave a comment if you have questions,
Hit Like if it made your day!